Tuesday, July 30, 2013

"Crossing Barriers"


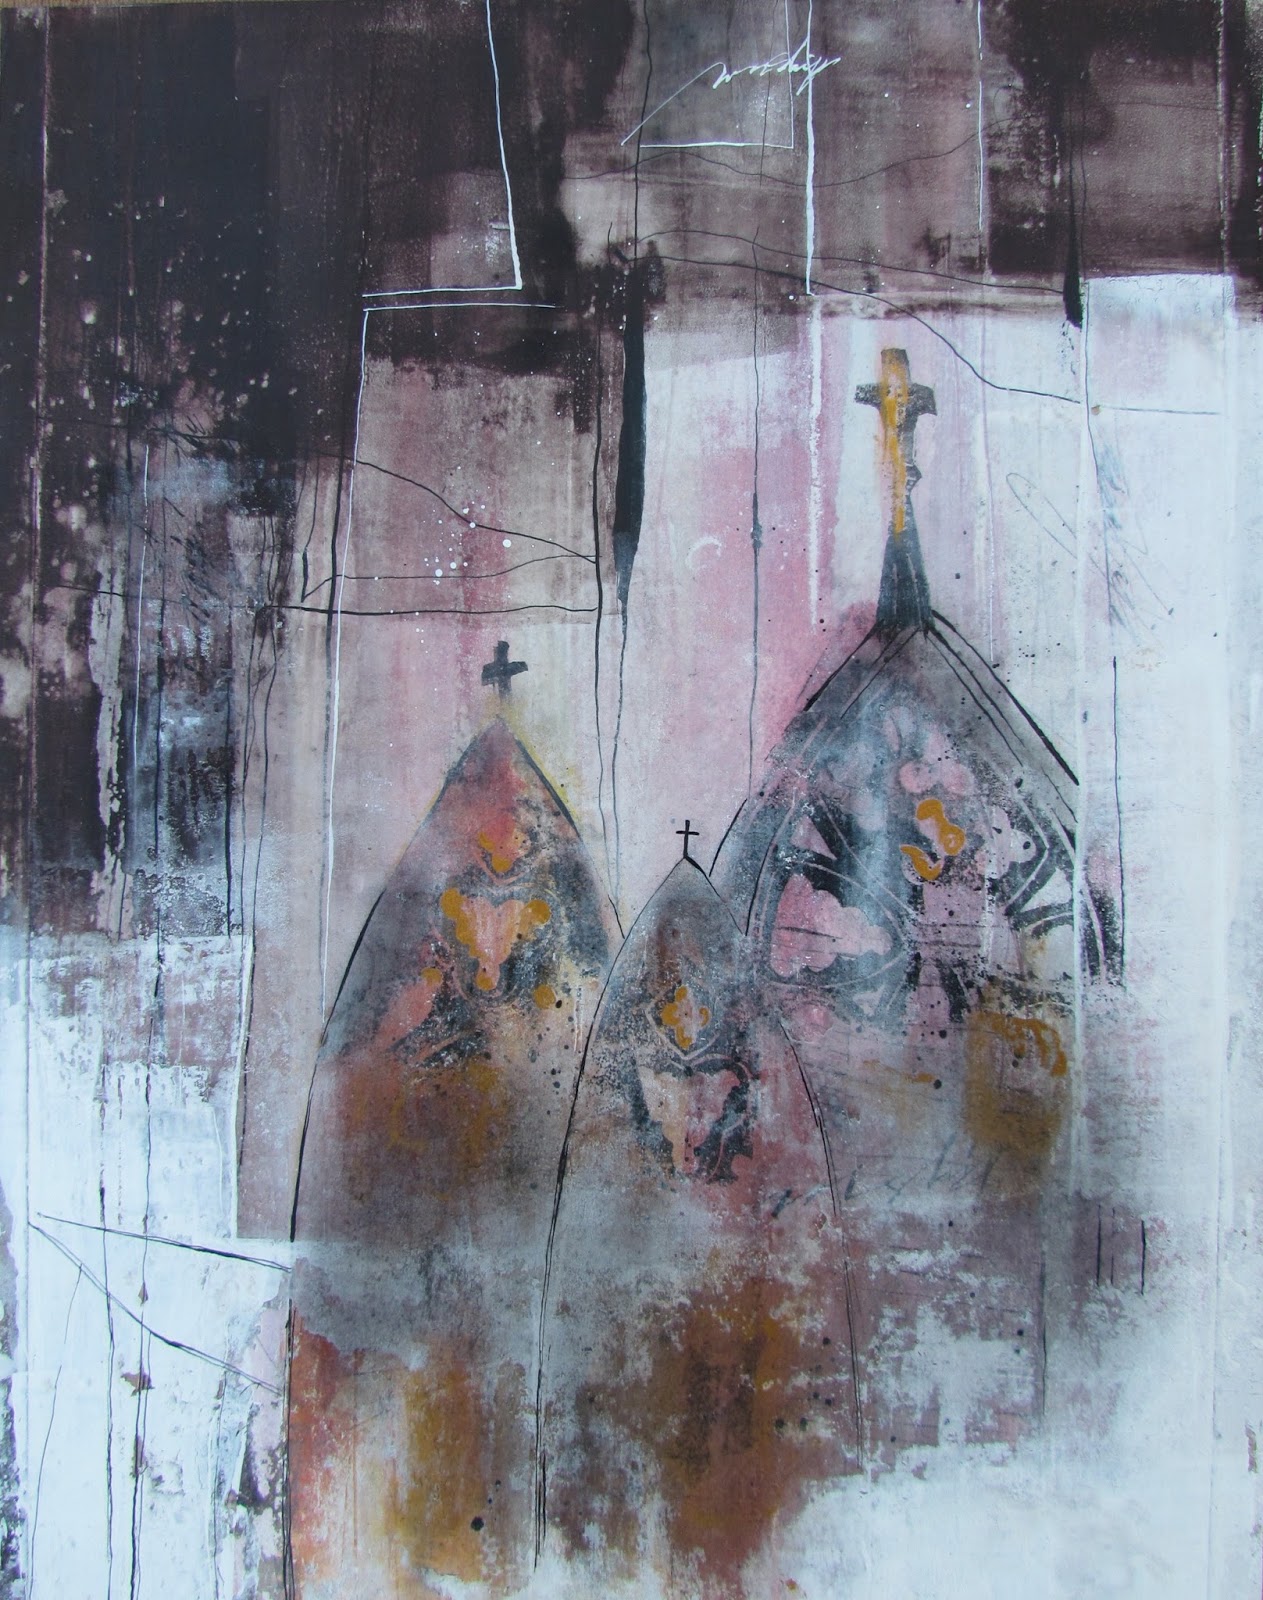
(unavailable.....4" x 6"....Color Block Presented on Masonite)

"Art crosses language and cultural barriers." You can see that the text chosen for these color blocks is Italian selected and cut from an Italian Design periodical. What I have noticed is that art, as well as music, speaks to every human being no matter what language they speak or culture they come from.Quite extraordinary!

This type of "color blocking" is tremendously fun, but before you begin cutting up all of your periodicals, I have learned a few things that will keep you out of the weeds (so to speak).

First of all, the piece looks more authentic and substantial if you adhere the magazine text to 140 lb HP first....with gel matte medium. And then you need to cover your collage with wax paper and brayer with a hard (clear acrylic) brayer....preferably on a glass or granite surface to make sure all of the wrinkles and bubbles are removed from the paper.

After doing this with all of your selected pieces, make sure it is dry by blow drying the front and back of the 140 lb. HP. You will then be ready to crop and fit all of the pieces to the support. In this case I used masonite primed with black gesso. It is also a good idea to choose different sizes of text and have a range of different sized blocks. This contrast of size is very important in this type of work.

After all of the pieces have "happy faces and are all in their places" (pun from nursery school days!)....spray the entire piece (2x) with spray acrylic coating. If you are not adding additional lettering, then the piece is finished.

If you are hand lettering, drawing, or anything else....prepare the surface with (2) parts water and (1) part gel matte medium. At least (3) coats are necessary to make sure you don't damage the magazine papers or have the ability to remove the lettering should you make a mistake.

Upon completion of the hand lettering, the piece should be sprayed (2x) and left to dry for several days. I generally spray it at least (2) more times before beveling the edge with sand paper and painting with black gesso. And there you have it...just a few more things to think about.

Monday, July 29, 2013

"Color Poetry"


(unavailable.....4" x 6"....Color Block on Masonite)

"Color has its own poetry." It also has the power to create a mood better than any other design element. It's a vast subject and the more I know...the more I realize how much more I need to learn.

That's why "color blocking" has an endless fascination for me. It's quite like adhering paint chips on a board. The piece you see today is comprised of remnants from a "color block" piece I did a week or so ago. The idea was to use very neutral colors with one bright color being the star of the show. I had two rules going into the process. One rule was to have the bright green form a shape from top to bottom. The other rule was to have a variety of different sized blocks.

By including several pieces with erratic lines and a circular blob of color on one block, I was able to offset all of the straight lines created by the blocks. The straight lines can also be countered by arranging colors side by side that are close in value. This type of work is also a good study in edges. It is absolutely necessary to have edges and erratic lines in some of the blocks to contrast with the hard edges created by the perimeter of the blocks.

For those who have created mono printed rice papers, there is yet another wonderful option. By covering some or all of the blocks with rice papers, the texture and line work of the print will create a very dynamic piece. And that's my plan for tomorrow's posting. I will create a another 4" x 6" using rice papers instead of heavy body acrylics. In fact, my postings this week will be a series of 4" x 6" blocks created with different materials.

It's all very exciting and I would encourage you to jump on in. The water's warm!! And there you have it...just a few more things to think about.

Sunday, July 28, 2013

"Heart Walls I" (final)


($200.00.....11" x 14"......Mixed Media Wall Series.....Presented on a 2" Cradled Board)

"Let love and faithfulness never leave you; bind them around your neck, write them on the tablet of your heart." (Proverbs 3:3) This is it! The first in this series is done. But I am taking a break from this type for a few days.

This was a very experimental piece for me, and there were a few challenges. I almost threw in the towel the day before I started the lettering. But wisdom prevailed and I decided to wait until the following morning to make the final decision. Once I saw it again with fresh eyes and some sleep, I decided to press on until the lettering was done.

The brush lettering in the top right hand corner stabilized everything for me, along with the decision to do white lettering. So the point in sharing this is to give encouragement to those who love to experiment and feel like they've landed in the weeds. The truth of the matter is that every single piece is like that unless you've worked through the issues with a particular style with all of the techniques and materials.

After all of the struggling, I have made some decisions concerning this series. I will be leaving a portion of all of the pieces completely untouched. In watercolor in particular, that does give the final piece a freshness that cannot be achieved any other way. I have also decided to do white lettering in all three pieces. The same techniques for creating the texture will also remain the same.

So just by making those decisions, I can feel assured that there are enough common denominators to keep the series coherent. And there you have it...just a few more things to think about.

Please contact me personally to inquire about this piece.

Saturday, July 27, 2013

"Heart Walls I" (draft 5)

(draft 5)


"Let love and faithfulness never leave you; bind them around your neck, write them on the tablet of your heart." (Proverbs 3:3...NIV) Not quite there yet, but the lettering is coming along. The process really slows down when it's time to add lettering.

Nothing has changed about the background today, but the informal versals can take a while. And rather than trying to speed up and try to get it all done this morning, I thought it might be instructive to let my lettering friends see a bit more of my process.

I generally begin laying in these types of versals by laying tracing paper over the piece so that I can see the shapes in the background. I then begin to write the letters with pencil first so I can erase and change things as I go along. The beauty of these letters is the fact that there are no descenders or ascenders to deal with and they can be expanded and compressed to fit into any shape.

After feeling satisfied with the spacing and slant, I then transfer the letters to the actual piece by scribbling on a plain sheet of tracing paper with a graphite pencil. I then slip that underneath the tracing paper with the lettering and go over it again with a pencil, checking to make sure it is transferring.

After this step, I go over all of the letters with a pointed pen loaded with the color gouache of the final lettering and simply fill them in with no pressure on the pen. And that is what you see on the part of the quote I still need to finish. I then erase the initial graphite.

And this next step is the most important. I check the slant and spacing one more time. In this case, I did remove several words and rewrite them in white gouache right on the original. Because the surface has been prepared for lettering, I can simply take a brush dipped in water and remove anything I like. After all of the adjustments were made, I began to build up the versals with a pointed pen and Bleedproof White gouache.

I may also need to go back and beef up all of the letters one more time. The best way to do that is to spray the entire surface (2x) with spray acrylic coating and then prepare the surface for lettering again. This keeps the pen from digging into the previous layer of gouache which can be very frustrating. And there you have it...just a few more things to think about.

Friday, July 26, 2013

"Heart Walls I" (draft 4)

(draft 4)


Some lettering has been added today, but there is more to come. The quote you see today is in Spanish and may be hard to see. It is meant to be background lettering. The English translation will be included tomorrow and easily read. It is Proverbs 3:3.

My decision to do all of the lettering in white was to bring calm to the very textured background. No matter what the lettering style, white can do wonders to bring calm to the piece. Of course, it will look strange and not well integrated if there is not white in the background texture.

Lettering or any other visual helps to solidify a piece like this where the texture is actually the main feature. Lettering and walls seem to go together. They appear in all kinds of walls...either in a graffiti style or a printed sign. I particular liked the Spanish word "escribelas" since it means "to write". It is very similar to the word "scribble".

So even though all of the lettering is not visible today, there is enough there to convey the sense of calm and add meaning to the piece. But just as a recap...there are still shapes and a range of values in the wall texture that provide the foundation for the piece. Lettering that is simply written on a solid piece of paper or a background with no shapes is immediately thrust into the category of graphic design. If the piece is to be classified as fine art, it is better to have actual paint, techniques of layering, shapes, values, and color. Not to mention the fact that it is far more interesting.

The medium used for the lettering was Bleedproof White Gouache. The large word was written with a pointed brush and the small script was written with a Leonardt Principle Nib. And there you have it...just a few more things to think about.

Thursday, July 25, 2013

"Heart Walls I" (draft 3)

(draft 3)


The title and direction of this series has changed to quotes from Proverbs having to do with what is written on the heart. The title is not referring to walls as a barrier, but what is being written on our heart and mind.

I decided to wait an extra day....maybe two...to practice my lettering. Today it looks like it will be versals, but that can change. And that's what the art process is all about. To stay locked into a preconceived mold throws the baby out with the bath water (so to speak).

So after viewing this piece most of yesterday, I realized that my darks were not dark enough. This is not just a standard faux finishing technique with an overall texture. The idea is to create a texture revealing all of the erratic shapes and crumbling nature of paint and plaster on an old wall. As usual... the problem was with the values. The darks were not dark enough, so I prepared the surface for a new layer with dilute gel matte medium and then added some soft pastels to darken the edges and some of the central shapes. The range of values from 1 - 10 on the gray scale helps build the foundation for the shapes and consequently the piece.

I am now satisfied and what will bring it all together is the proper placement of the lettering. And this is a lot of staging for the star of the show, but will be worth it in the end. Another option (especially if you're not a lettering artist) is to incorporate a drawing or do some deconstruction with a piece or two of collage so it looks as though it were peeling off.

And that's the process of my first "Wall" series piece. There will be two more to form this "Heart Wall" series and then in the future I could have another type of "Wall" series. Sequels are always good. And there you have it...just a few more things to think about.

Wednesday, July 24, 2013

"Walls I" (draft 2)

(draft 2)


Hopefully, you can see the peeling paint effect today. It requires more than just a few layers to create this look. It is an "edgy" look and will not appeal to everyone, but it is something I am compelled to create.

After yesterday's posting, the next step was to add more masking fluid over the original white of the paper, but much less than before, and to also cover some of the first (3) glazes. After allowing the masking fluid to dry overnight, I painted a darker glaze over the entire surface. I added Sepia (Daniel Smith Brand) to the redi/orange mixture from the previous glazes.

After drying this, I removed the masking fluid with a hard eraser designed for this purpose. And to add some more shapes, I applied some watercolor ground in an erratic fashion along the right side and the bottom. The same dark glaze was applied to this area only and painted (3x)....drying in between.

Of course, it wasn't integrated into the piece like I wanted so I used rubbing alcohol, brayer, and Viva paper towels to remove a great portion of what I just laid down. And I'm talking about spraying the paper and brayering and then scrubbing it off with a paper towel for about (30 min.). I then beefed up the values with a dull purple and light violet soft pastel by scraping it on a paper plate and brushing on with a soft brush. All of this was sprayed with spray acrylic coating and that is what you see today.

You might wonder why anyone would bother to paint something and then remove most of it, but I guarantee you cannot get an aged texture without doing that. It will look contrived every single time. If you think about it, this process follows the natural aging process. You paint something, and then it rains, the wind blows, the Texas heat kicks in, and very soon you will see the removal of portions of your paint.

After studying the piece today, I will more than likely adjust the values a bit with either soft pastels or more glazing. I will then add my quote for the final. And there you have it....just a few more things to think about.

Tuesday, July 23, 2013

"Walls I" (draft 1)

(draft 1)


There is no quote yet, but this is the first piece in my "Wall" series. What you are viewing today is the first (4) layers of watercolor. The white paper showing was masked out with masking fluid before painting the glazes.

Whatever makes an artist stop in their tracks visually is worth a bit of photography or note taking. For me, it has always been texture...especially old walls with peeling paint...patches...and scrawled words. I have set about to look through all of my periodicals and compile a journal of wall pics that can serve as a starting point for this series.

There are a variety of textures and colors in my collection. It is much like having an inspiration board. A cork wall or board could also be used to inspire your direction. The main design consideration in the "Wall" series is making sure that I have identifiable shapes. No matter how vague or what size...paintings are made up of shapes.

So the first step in this first piece in the series began by sponging on some masking fluid (WN brand) and also using my "gloved" hand to spread it around. the idea was to make it look erratic and spontaneous. After the masking fluid dried, I painted on a dilute portion of Hansa Yellow over the entire piece. After drying this first layer with a hair dryer, I repeated the process with a layer of Caput Mortuum Violet (WN). The last glaze was Red Med. (WN) plus Hansa Yellow Med. (Daniel Smith) After drying the piece thoroughly, I removed the masking fluid with a hard eraser designed specifically to remove the masking fluid. And that is what you are viewing today.

So to sum it up...I have created shapes as well as preserved some white of the paper. I will add some background lettering before tomorrow as well as more masking fluid and a bit more glazing. This is just one watercolor technique and well worth the effort. And there you have it...just a few more things to think about.

Monday, July 22, 2013

"Old Wall" (experimental piece)


(unavailable....4" x 6"....experimental watercolor work)

"Generosity is a state of mind that is always giving." My main focus today was experimentation rather than a finished piece. However, I felt compelled to include some lettering and an original quote.

Old walls, peeling paint, along with discoloration and patina have long been a passion. I can stand in front of an old wall and have the same passion that I feel in front of an exceptional work of art. So I have some new materials and needed to play around with them and this small 4" x 6" is the result.

It is a watercolor incorporating masking fluid and watercolor ground in between layers. This is my jumping off point for a series of "old wall" pieces that will be shown in an upcoming exhibit called "Poetic Collections".

I began with pale washes of watercolor, but after the first layer (with the paper bone dry), I brushed on a band of masking fluid with a sponge brush. After that dried, I glazed over the entire piece with another dilute wash....dried with hair dryer....removed masking fluid. These steps were repeated several times and then I created a new shape on the right hand side and bottom by brushing on a dilute portion of the watercolor ground, followed by drying and painting again.

Of course, lettering was adding along the way along with some erratic lines. So the creation of this look is similar to the gesso works, but with different materials. I do like the watercolor because it adds a great deal more luminosity than acrylics.  (Better seen in the original)  This piece will stay in my notes and I will continue experimenting until the "old wall" series is completed. And there you have it...just a few more things to think about.

Sunday, July 21, 2013

"Gracias" (final)


($180.00......6" x 12".....color block......mounted on a 2" depth cradled board)

"Gracias is the fertile soil of gratitude." Along with the title, many changes have taken place and here is the final. This piece will be in an exhibition sponsored by Capital City Scribes this coming October.

This piece shows the drama created by implementing a hugh contrast of size. Contrasts are so important and the drama created will vary depending on the amount of contrast. If there is a slight contrast of size, that will certainly give the piece some energy, but a large contrast will deliver the drama in spades.

My main contrast in this piece was size, but the same principle holds true for a hugh contrast of line and its direction, color, value, and texture. There is also a hugh contrast of light and dark (1 and 10 on the gray scale and values in between). Another contrast of color that I used was the contrast of extension. This contrast has to do with the percentage of space a color occupies. In this piece, the dark green juxtaposed with the desert bronze color is almost equal with the darker values, but taking a slight edge. If one of these colors had some real dominance, there would have been less drama and more unity.

You can also see that the principle of repetition (echoes) is one of the power drivers of color block pieces. The same holds true in mosaics. Repetition creates rhythm and pattern in a piece.

One other thing to note is the "cowhide" type of spots on a few of the pieces which helps to break up some of the straight lines. The gestural writing in the paint does the same thing.

It's really all about design which can take a piece in any number of directions. And there you have it...just a few more things to think about.

Please contact me personally to inquire about this piece.

Saturday, July 20, 2013

"Gracias" (draft 3)

(draft 3)


Tomorrow I will hopefully be posting the final. The name will also be changed to "Gracias". You can see that several things have been removed and several pieces have been added.

Every decision that an artist makes when creating a piece changes the direction of that piece. My decision to have a hugh contrast of size in the color blocks greatly influenced the direction it would take. All of the pieces you see today are already adhered to the board out of pure necessity. It is very difficult to keep them all in their places while trying to cut and decide where a new piece will go.

This is similar to creating a mosaic, but has an altogether different texture. This is my fifth color block piece and they really do look like metal when sprayed several times with spray acrylic coating. This one is particular nice because of the Duochrome Desert Bronze....a Daniel Smith Acrylic. It is impossible to see the shimmer on the computer screen, but it is a stunning color in the original.

Another important tool to have on hand is a see through grid ruler. They are available at most office supply or craft stores. It would be painstakingly slow to line these blocks up and keep them straight without this ruler. They are also good for ruling up your lines for lettering.

Tomorrow you will see the smaller color blocks forming a shape from top to bottom. There will also be a fairly good size block of the bright green. By limiting the colors down to about (5)...I am able to create a lot of echoes (or repeats) and that unifies the piece. There will also be one color dominating....desert bronze. So as I finalize the piece, I will be making sure that color takes up more of the design space. (And I might change my mind and make the green dominate.) And there you have it...just a few more things to think about.

Friday, July 19, 2013

"Gracias" (draft 2)

(draft 2)


Last evening I decided on a finished size of 6" x 12" in a vertical format. A few blocks have been completed and laid on the support. Nothing will be adhered until everything has been decided.

What I decided this morning was to have a larger contrast of size, so I will be cropping some of the pieces you see, making new ones, and including a variety of small sizes mixed in with the larger ones.

Contrast of size adds a lot of drama to a composition and brings the viewer in to a particular area, especially if the contrast is quite significant. So my plan is to have some smaller blocks that are less than an inch in size to create a focal point and a lot more repetition of all of the colors. This does take more time, but is well worth the effort.

It is always a good idea to notice the size of shapes in other artists' artwork. By analyzing and comparing how you respond to contrast of size, you will fully comprehend the power of this important contrast. When everything is too much the same size, the piece may be unified, but lack energy. In fact, contrast is the number one most important design principle....especially in a day and age when we are all bombarded by visuals.

So it might be a good idea to analyze as much artwork as possible to take note of all of the contrasts you see. Be looking for contrast of line (including edges and direction), color, texture, shapes (size), and values.

Analyzing a particular piece of artwork is more valuable than simply reading about design and trying to include the principles in your work. If you can see it in a finished piece of art, it will make a lot more sense and be more easily understood. And there you have it...just a few more things to think about.

Thursday, July 18, 2013

"Gracias" (draft 1)

(draft 1)


Today's posting represents the underneath layer of a new color block piece. You can see that all of the colors are muted except for one large strip of bright green.  (It's much brighter in the original.)  The quote has not been written, but will appear in the final.

After creating several color block pieces, I have learned to paint the underneath layer to all of the pieces in one "fell swoop". It saves time. It also helps me to choose my colors and see how they work together. I am pleased with the color choices and this is an experiment in using all diluted colors except for one. And that one color is a WN acrylic called Green Middle. It was on sale. I cannot possibly imagine me buying such a peculiar color at this point, but it will be the star of the show in this piece.

These painted papers will need to dry all day and tomorrow morning I will apply the top coat and reveal part of the undercoat by using a sgraffito technique. I haven't determined the size yet, but an 11" x 14" is coming to mind. That decision will need to be made today so I can paint the cradled board with dark green. (It almost looks black, but it is actually a mixture of the bright green color plus black.) You cannot see the bronze effect on the computer, but the strip that is second from the end on the right is a Daniel Smith acrylic called Duochrome Desert Bronze. It has a green and bronze look and will add an iridescence to the piece.

Most of the decisions at this stage of the game are minimal, but that will step up dramatically by tomorrow. Some other directions for this type of grid design could also apply to photography or old book elements (especially the covers).

It is an inspiring way to work and I highly recommend it to anyone who likes experimentation. And there you have it...just a few more things to think about. (Clicking onto the label called "color blocks" will bring up other pieces I've already completed.)

Wednesday, July 17, 2013

"illumination" (final)


(unavailable......5" x 10"....experimental gesso work)

"Illumination can be seen or unseen." I love words that have dual meanings and such is the case with the word...."illumination". When something is illuminated in the physical realm, it can easily be seen with the eyes, but there is another kind of illumination such as a moment of deep insight. This inner illumination cannot be seen, but has a tremendous effect on the person who received the illumination.

With just a few more details....this piece is now finished and will stay in my personal archives as an experimental piece. I do like it because it represents the layering process where a part of each layer is left untouched so that a portion of all layers can still be seen in the final.

This kind of layering creates a lot of depth and is a process I love to explore. Additional line work was added, as well as a few soft pastels to create a piece with shapes, contrast of edges, and an ethereal quality.

Every artist benefits by experimenting with process, tools, and mediums in order to create new and innovative pieces. It can be difficult because the percentage of failure is extremely high. However, there comes a time when all of those negatives must be put aside in order to achieve a greater goal.

By notating all of the previous layers, I can now look back and see if I would have been more satisfied by stopping with a previous layer. So my encouragement is to continue to notate your layers with a digital camera so you can gain the optimal experience from each work. Every piece of art created will teach you things you would not otherwise know.

It is good to keep pressing on and create as much as you can and learn new things as often as the opportunity allows. And there you have it...just a few more things to think about.

Tuesday, July 16, 2013

"illumination" (draft 2)

(image 1)

(image 2)


The purpose of draft (2) was to establish shapes and a variety of edges, plus contrasting texture. The one constant in each layer was to make sure that part of the previous layer remained untouched. So you can see that the largest part of the blue shape is the part that remained untouched from yesterday's posting.

If you look at yesterday's posting, there is definitely a look of fluidity and soft edges with the mono printed layering of watercolor. However, there are no clearly defined shapes. To some that is not problematic, but paintings are made up of shapes and to maintain viewer interest, the shapes become very important. They are the foundation of a piece of artwork.

Many artists have created works with little or no shapes and succeeded in the fine art world. In that case the artist was focused purely on color since lines and values create shapes. So what I am showing you today is how I preserved what I loved about watercolor from the first draft and how I then introduced more watercolor glazing to define more shapes. That's what you see in image (1). The purple color is Caput Mortuum Violet (WN brand). I also used more Cerulean Blue.

After drying these new layers (3 layers of the violet), I also created some line work with pen and ink and pencil. Next came the application of diluted white gesso (1:1 ratio) with a credit card. I dried this layer with a hair dryer and then applied another layer. After drying the second layer of gesso...I sprayed alcohol over the shape with the violet underneath followed by brayering. I continuued this until satisfied with the texture and that's what you see in image (2).

I can clearly see that more line work will add to the piece and then I will spray it with spray acrylic coating, prepare the surface for lettering and add the quote. After studying it throughout the day, I may choose to add some other element, but only time will tell. Right now, the focal point is the beautiful watercolor shape from the first layer. And there you have it...just a few more things to think about.

Monday, July 15, 2013

"illumination" (draft 1)


                             (draft 1)


The image today is the beginning of a new work that has begun with watercolors. There are few mediums that can offer the luminous light effects that watercolor can. Glass is one other such medium, but it is not as portable or cost effective as watercolor. The quote will come later.

I woke up today with my mind on watercolor since there is an upcoming class coming to my studio. Even though I am not teaching the class, my desire is to see all of the luminous effects that will appear from this class.

So I decided to hunt down a quarter sheet of 140 lb. HP and do a bit of mono printing. Glass is undoubtedly the best surface for mono printing techniques so I squeezed out a small bit (1/8 tsp...or less) of Viridian Winsor Newton color onto the glass. I then sprayed a good amount of water and mixed the color and water thoroughly with my fingers (wearing gloves). I gave the paper a quick spray of water, but not over the entire sheet and then laid that paper down into the color and lifted it off...followed by drying with a hair dryer.

This same technique was repeated with Cerulean Bl.(WN brand), but not printed over the entire sheet. After drying, the technique was repeated again with Titanate Yellow (Maimeiri Brand) and then dried and cropped.

The word "illumination" was then written gesturally with a pencil. What I like is the combination of white paper showing...soft and hard edges....and especially the light effect that happens when watercolor is not overworked. This method prevents overworking since there is no brush work involved. The danger of watercolor is overworking or having a totally "dry brushed" technique. Watercolors are best created with water. (imagine that!)

Of course this is totally abstract with no representational image, but it does set the stage for the next step. In my case, the next step will probably be the addition of gesso to introduce more shapes, but leave the best of the luminous watercolor effect untouched. And there you have it...just a few more things to think about.

Sunday, July 14, 2013

"Across The Way"


($180.00.....6" x 6".....oils on gessobord flat panel....presented in custom frame))

"A good vantage point is often found across the way." The best quotes come to me in comparing art to life. In this quote, what is true when painting "en plein aire" is also true when pondering a decision in life. Having a good vantage point always comes into play.

This small palette knife painting was created at Bull Creek here in Austin. Because palette knife painting often has a build up of paint without a ton of detail, it is best viewed from a distance. So when standing back from the piece you can see several large boulders with a reflection in "greenish/gray" water and a sandy bar in the foreground. I did tilt the grays in this piece towards purple to be a direct complement to the yellow greens and grays in the piece. And that is where I am in my painting process today.

I am playing around with the color to achieve a scene that is identifiable with a lot of color interpretation. My ultimate goal is to go even more abstract, but that takes patience and time to master so I am still working on that long range goal.

After creating (3) smaller pieces from Bull Creek, I am anxious to use another photo from that area in conjunction with my smaller pieces as color references to create a larger work. One of the challenges to larger "wet into wet" techniques is that it really needs to be finished in one session. Even though the paint is oil and takes a long time to dry, it does begin setting up within 24 hours and is not as workable...especially with a palette knife.

At the moment, I am thinking about inching my way larger with a 10" x 10" or 9" x 12". It's all very exciting! I just need to work up the courage to jump into it and get it done. And isn't that the way most new processes work? So there you have it...just a few more things to think about.

Please contact me personally to inquire about this piece.

Saturday, July 13, 2013

"Cathedrals" (final)


($250.00.....11" x 14".....gesso work on 140 lb. HP....mounted on a 2" depth cradled board)

"Cathedrals in all their grandeur cannot compare to the cathedral of the heart." You can see that the lettering was done in a gothic style called "textura". I deliberately left them in a lighter value. Most of the time, especially on this type of surface, white lettering has to be retouched to deepen the value.

Another intentional decision was to slightly angle the lettering to mimic the line work throughout the piece. It also gives movement and makes it less contrived.

There are several "take aways" from this piece that I would like to share. First of all, when creating erratic lines and shapes with gesso as well as white gouache....the value of these areas can be muted by brushing on a bit of charcoal powder after they're dry.  You can see it quite clearly in the cathedrals where there is a grayish/ whitish texture. It adds an ethereal look and is a very useful technique. If you consistently create mixed media work, black charcoal powder and a soft brush (Hake brush or blush brush) are an absolute necessity.

Line work is your friend when it comes to integration. By creating white lines in the dark areas and black lines in the white areas, I created conversations between the shapes which results in integration. 

Breaking up solid shapes of color with rubbing alcohol and a brayer or laying down color with gouache and brayer and then spraying lightly with water can create very interesting texture. I did this on the left side where you see texture in the dark area.

Using a pointed pen and a press/release technique can help create lines that are thicker and thinner in places which makes them much more interesting. It is also good to have line work created with a variety of different mediums....such as gesso applied with a credit card....pencil lines....pointed pen and ink lines....scratching into damp paint with the corner of a credit card or palette knife...etc

As I mentioned in draft (1), I attempted to write down most of the questions that needed answers as I moved through the steps of creating. There were approximately (50) in all which simply illustrates that it takes many steps to create a piece of artwork. Asking the right questions will give you the right answers. And there you have it...just a few more things to think about.

Please contact me personally to inquire about this piece.

Friday, July 12, 2013

"Cathedrals" (draft 3)


"Cathedrals in all their grandeur cannot compare to the cathedral of the heart." Hearing the sounds of a choir singing upon entering a cathedral is a rare and beautiful moment, but the cathedral of the heart is a place one can visit at any time.

It isn't finished yet, but I am almost there. This piece has now been cropped to an 11" x 14" and all of the edges, lines, and shapes have been adjusted to my satisfaction. It is time to stop this part of the process and move to the lettering. My thought this morning was to bring more of the dark area into the white shapes and vice versa. I did this with line work...removing more paint with alcohol and a brayer...and by adding gold gouache and black charcoal powder.

Holbein manufactures an Acryl Gouache called Gold Orange that has a vintage quality that is perfect for these types of pieces. I applied the gold with a brush in select areas of the cathedrals. It was too even and solid so I used alcohol and a stiff brush to remove and disperse the paint. After drying, I added black charcoal powder right over the gold and other areas of the cathedrals.

You can also compare with the previous posting and tell exactly where I added more line work and a bit more lettering. I am now satisfied that there are definite shapes with a variety of edges and line work that are having a conversation with each other.  Tomorrow, I will add the lettering and post the final.

While this mixed media piece has been in process, I have also been doing some palette knife painting in oils and very pleased to have another creative area to express my voice. It's all very exciting, but if you find it overwhelming to think about too many processes at once, I strongly encourage you to focus on the techniques that can be combined to express your deepest longings in one area.  It's all a win-win and very healing to the soul. And there you have it...just a few more things to think about.

Thursday, July 11, 2013

"Cathedrals" (draft 2)

(image 1)

(image 2)


No quote yet, but by tomorrow, I feel sure I will have one. As you can see, there have been many changes since yesterday. I am going for a very ethereal look.

Last evening, after viewing my piece several times during the day, I had the urge to go over the cathedral imagery again with the same colors plus adding some alizarin crimson to the yellow shape. I also laid a kleenex in a place or two to lift part of the color. It was left to dry overnight.

This morning, one of my first questions was how much detail to add....what tool to use....what color and type of pigment. I began with moon palace ink and a pointed nib, but decided to go with something a bit more graphic and found a hand cut stamp of a cathedral that I cut several years ago. Rather than inking the whole stamp, I chose fragments and stamped those on with Speedball Printing Ink applied with a brayer.

After writing a few words and creating different types of line work, I dried the piece...sprayed (3x) with spray acrylic coating. The reason I sprayed that many times was due to the thickness of some of the ink. After drying the piece again, I used a sponge brush and applied dilute gel matte medium 2x. After drying that layer, I laid in the dark shape which was cobalt blue + brt. sienna gouache. The reason I chose that medium is the ability to lift it if I didn't like the result. Because it is an opaque watercolor, it also has a bit of a translucent effect in places. (You do need to brayer it on and then keep brayering until it becomes smooth.)

White gesso was also added (1:1 ratio with water) and dried. Alcohol and a brayer were used alternately over the gesso to create the texture you see in image (2). I also repeated all of these steps....spraying...brushing on med...adding more gesso...etc. until satisfied.

Today I will be studying this image and seeing if I need to do anymore "tweaking" of values and shapes before deciding on the lettering. So far...I have asked and answered (30) questions about this piece. And there you have it...just a few more things to think about.

Wednesday, July 10, 2013

"Cathedrals" (draft 1)


(image 1)


(image 2)


This is the first in a series with cathedral imagery (if all goes well). I have long been enamored with arches and cathedral imagery. The first decision I needed to make was what kind of cathedral imagery...especially how much detail to include.

At this stage of the game, I chose watercolor in three arch shapes with no detail. There are also some vertical bands covering the page from top to bottom in alternating color. After each application of watercolor, I dried the paper (140 lb. HP...taped to a masonite board). The tape used was gummed taped specifically designed for watercolor paper.  After finishing the watercolor portion, I sprayed the surface with spray acrylic coating since watercolor is obviously water soluble. This is what you see in image (1).

The next step was to apply white gesso. I chose to apply the gesso with an old credit card in (3) vertical bands with the watercolor pigment in between these bands. I then dried the gesso and sprayed with rubbing alcohol followed by removing portions of the gesso by brayering. This was not just one pass with a brayer, but went on with alternate spraying and brayering for about (15) minutes.

When I was satisfied with the amount of pigment peaking through and the texture created, I made erratic lines in the gesso areas and wrote a few words while the paper was still damp. The result is what you see in image (2).

You can see from all of the previous postings just how much of an experimental process mixed media is and how many decisions need to be made along the way. In this piece, I am writing down all of the questions that come to mind as I work. So far, I have answered (10) questions and I've barely started the piece. And there you have it...just a few more things to think about.

Tuesday, July 9, 2013

"Stepping Stones"


($180.00......6" x 6".....Oils on a 3/8" depth Gessobord Panel....Presented in Custom Frame)

"Stepping stones will get you from one place to another." The stepping stones in this image allowed me to cross over water as well as go a bit higher on the rock. This is a beautiful metaphor for real life and choosing the right stepping stones (or choices) to reach an important goal.

In art, process is another word for stepping stones. It is important to think about what you're thinking about. In fact, an interesting exercise is to write down the questions that come to mind as you are working through the process of creating art. The very act of doing this can identify some more decisions you need to include or some you need to leave out.

In this oil painting, one of the first decisions I made was to decide what to paint. It was painted on location so the information I could have included was vast. It is quite necessary then, to have as one of your first decisions to select what to include in the painting. This sounds like one of the most logical first things to think about. I thought that, too, until I began to read that one oil painter (whose work is very skilled and mature) spends as much as (3) hours studying the area to be painted before putting paint to canvas. This was stunning to me.

So my next thought was to try and determine the myriad of things I should be studying during a (3) hour period. And that is where I am in the process today. Some of the things that came to mind were things like value studies...shapes...identifying the root colors and how intense or diluted the colors are...etc.

So my next paint out will include a clip board and pencil for taking notes rather than starting to paint first. I will also take a lot of photos as well as using a view finder before painting. This is a very important topic and my hope is that you will also be thinking about all of the questions that need to be asked while creating art.

I have a theory.....if you ask the right questions...you will get the right answer. And there you have it...just a few more things to think about.

Please contact me personally to inquire about this piece.

Monday, July 8, 2013

"Lavender Blues" (final)


($200.00.....11" x 14".....Gesso Work on 140 lb. HP........Presented on a 2" Depth Cradled Board)


"Improvisational art has a syncopated rhythm." By the erratic placement of color shapes and a close division of space between the positive and the negative...syncopated rhythm occurs.

Drama can be created in a piece by allowing the positive and negative to occupy almost equal amounts of space. it also helps if those two space divisions are odd shapes with some of them appearing in a back and forth fashion. For instance, the light colored windows in the dark area and the dark windows in the light area add to the drama and rhythm of the piece.

In making the final decisions about this piece, I tried to preserve textures that were pleasing and made sure that a portion of all the previous layers remained in tact. Other decisions had to do with the treatment of the edges. I didn't want all of the edges to be solid and severe so I broke up some of those by "inching" my brayer into those shapes a bit and creating a transitional value between the extreme dark and extreme light edges.

I also used a break off knife to scratch into the dark shapes and some of the light shapes to reveal the color underneath. In the dark area, the underneath color was mostly white so I painted on a glaze of Quinacridone Burnt Sienna (fluid acrylic) to tie in with the brighter burnt sienna in the center portion of the piece.

You can also see a tinge of lavendar and burnt sienna in the white gesso areas as a result of spraying alcohol and brayering over the surface. The brayer automatically picks up some of those colors and carries them to the white.

My lettering is a mixture of italic and spencerian script written with a Mitchell #6 nib. Of course, the surface had to be prepared for lettering. It is quite impossible to write with pen and ink over this surface unless it is prepared with (2) parts water + (1) part gel matte medium. And there you have it...just a few more things to think about.

Sunday, July 7, 2013

"Lavender Blues" (draft 2)

(image 1)

(image 2)


One thing that every artist learns over time is that layering creates depth. And so, today there are two more layers and more definition of shapes.

Windows (or rectangular openings) have long been a favorite shape in mixed media work. Artists like Katherine Chang Liu, Peggy Brown, Carole Pickle, etc. have all used windows in their work. They are an effective way of revealing previous layers and perhaps showcasing a particular image.

In the first image today, you can see that I used Dioxazine Purple (slightly dilute Heavy Body Acrylic) to create some rather dramatic dark shapes on either side of the central portion which will become the main focal point.

I began my decision making by using some cropping "L's" and a light charcoal pencil to mark off the rectangles. They are all different sizes and include portions of the original layers. Also, in image one, you can see that I defined the rectangles by using some white gesso. All of these newly painted areas were then texturized by spraying alcohol and removing (or deconstructing) portions of the paint with a brayer. I also allowed the brayer to enter into the rectangles a bit to create a more interesting edge and a transition value.

This particular purple can be very cold looking so I warmed the entire piece up a bit by adding Quinacridone Burnt Sienna (Fluid Acrylic) with a brayer. You can see how it shows up as a highlight in the dark purple areas and creates a lot of drama in the center area. Again, I was careful not to cover up all of the white areas and the purple areas in the rectangles were also left untouched except for the edges.

Today, I will be cropping the piece....adding more white gesso....adding some gestural lines...etc. From my commentary, it may sound like all of this was planned to the smallest detail. But I can assure you that I am only describing what I did after the fact. It was all intuitive while I was working. That's the nature of "jazz painting". And there you have it...just a few more things to think about.

Saturday, July 6, 2013

"Lavender Blues" (draft 1)

(image 1)

(Image 2)


This is the beginning of another piece so I do not have a quote yet. The technique involved consists of heavy body acrylic, white gesso, a brayer, and rubbing alcohol. This could be called "jazz painting" since the piece is being made up as I go along.

 For many years, "jazz writing" was a popular thing to do.....still is. It involves writing in a polyrhythmic fashion by exploring different spacing options and different sizes and weight of the letter thrown into the mix. Including in that type of writing now is a popular term called gestural writing. And it looks easy, but it really cannot be done well without an established foundation in italic or other script hands. So what I have begun in today's posting is my version of "jazz painting".

There are not many rules, but I have established a few just so I have a particular direction to the piece. The first principal of design I am adhering to is to create shapes. In the first image, I actually delivered paint to the surface (140 lb. HP) with a brayer. The color is Dioxazine Purple (Golden). I also sprayed alcohol into it so by the time I got through, there were darker and lighter areas of this color covering most of the quarter sheet of paper.   I also made some gestural marks into the paint with the corner of my credit card while it was still wet.  This dried overnight.

This morning, I added white gesso (full strength) to the areas you see in (image 1). The gesso was delivered to the paper with a credit card and then dried thoroughly with a hair dryer. And this leads me to my second rule which is to leave a portion of the previous layer in tact. Hence, you see a good portion of the original paper still showing.

The next step was to spray the white gesso areas with alcohol to break up the surface and create more texture by lifting the paint erratically with a lot of brayering. More alcohol and more brayering followed until I was satisfied with the texture. And I deliberatedly left a small portion of the white gesso untouched while rolling the brayer over a portion of the original dark purple area.

So in the final analysis, it is all about what to reveal or conceal. And that, to me, is the essence of "jazz painting" and is quite fun to do. And there you have it...just a few more things to think about.

Friday, July 5, 2013

"Color Poetry" (final)


($150.00.....12" x 12"....mixed media on 140 lb. HP....mounted on a 2" cradled gessobord)

"Color is the rhythmical composition that creates poetry in the landscape." It is a more subtle form of color blocking and a completely experimental piece. I was influenced somewhat by a lavender farm and there are vague color forms that could bring the image of that type of scene to mind.

This piece is all about alternating color and texture. White gesso was one of the leading players in this technique so I am pleased about what I learned. Now I am in the mood to do another gesso piece without the color blocking. It is a very captivating technique, but after all is said and done, I do prefer the color blocking pieces to be created with heavy body acrylics and bright colors played against neutrals.

It is always a good idea to play close attention to what you keep coming back to in the way of tools, techniques, and composition. Experimentation is a must for most artists to discover what direction they want to expend their time and energies on. Mine seem to change, but I am noticing that some things keep resurfacing on a regular basis. Even though I continue to gravitate towards the contrast between transparency and opacity, I have very strong feelings about the palette knife and the texture it creates.

So I will probably not be gravitating to oil paintings that have thin applications of paint. Just "show me the paint" and I am much happier! Gestural mark making and lettering is another hugh deal in my art voice. It gives so much energy to a piece and gives voice to my basic love of lettering. Even when I have a palette knife in my hand, I have a tremendous urge to use the corner of the knife to write into the paint. And it's even better even there is an undercoat of a different color that shows through after the mark making.

So I guess the point of all of this is to think about what "floats your boat" in the deepest levels of your being. We all have a unique art voice and it takes time and reflection to sort all of that out, but that is one of my purposes for sharing my own thoughts on the subject. Sometimes it will allude you altogether and you will need to hear it from another artist. Be a willing partner in giving other artists that type of feedback as well as giving it those who ask you for it. Or you can do what I do and give your feedback even when it is unsolicited. If an artist thinks that oils are their "deal" and yet they keep talking about and show passion for three dimensional work then maybe they need to hear that from somebody who is listening to what they're saying. They will be grateful in the end. And there you have it...just a few more things to think about.

Please contact me personally to inquire about this piece.


Thursday, July 4, 2013

"Hill Country Grays"


($180.00......6" x 6"....oils on a flat gessobord panel.....presented in a custom frame)

"Trust in God is the bedrock of all other freedoms." I chose not to inscribe this quote into the oil paint. However, it will be attached permanently to the back and be included in the interpretation when exhibited. We are blessed to have an abundance of rock in Central Texas. It is a characteristic of our region. Texans are proud of the United States and very proud of our state. We celebrate this fourth of July with thankfulness in our hearts.

As to the piece I have been working on entitled "Color Poetry", I wanted a bit more time to think about its direction and the other decisions I need to make to bring it to completion. In the meantime, I have recently been outside painting. The piece today was painted on location at Bull Creek right off of 2222.

The rock is a favorite subject when painting out in our area. By using a double palette (warm and cool of each primary) plus white, I am able to mix a full range of cool and warm grays. You can clearly see the contrast in the rock formations. Some of the grays in the rock have a bit more yellow cast and some have a bit more blue cast to them. This creates a push/pull in the painting that I find most interesting. 

My love of the palette knife continues. The way the paint is delivered to the surface is a bit different than the brush. I always lay down one undercoat of paint first. That color is determined by what I need to have peeking through with trees, rocks, etc. In this case, I mixed a very dark gray by using ultramarine blue, cad. red medium, and cad. yellow light. I also reserved part of this paint to mix with white to create some of the other grays.

By having this very dark gray over the entire surface to begin with laid the groundwork for exposing the bits of dark gray that appear on and in between the rock formations. It also mixes with the dark greens and the blue in the water to create those darker values.

I began the piece by laying in the rock colors first and establishing the strong diagonal. Next came the green that appeared above the rock and then I worked on the water. I laid the water colors in by dabbing them on carefully and then rock my palette knife over them to create the look of ripples. Foreground interest is very important to me, so I chose an angle that included a tree. The tree trunk also creates another division of space from top to bottom.

This diversion from mixed media was a pleasant change of pace. My hope is to do some larger palette knife paintings. This one (6" x 6") took me about two hours, so the challenge is to have a large block of uninterrupted time to complete a larger painting in one day. I like to work wet into wet, so finishing in the same day is a hugh deal. And there you have it...just a few more things to think about.

Wednesday, July 3, 2013

"Color Poetry" (draft 3)

(draft 3)


This piece now has a title which will definitely narrow down the multitude of directions it could have taken. And that is the beauty of decision making. With each decision the lens of the visual artist gets more and more focused.

My most important decision today was choosing a color to go with the red/orange color of the first two postings. After posting yesterday, I did go back in and beef up the color of the red with a few passes of dilute fluid acrylic (burnt sienna). Most of my time this morning was spent creating the purple color. The purple I chose was Dioxazine (Golden) which is very intense. I did mix in a lot of Burnt Sienna to gray it down a bit and create a common denominator with the color from the first sheet.

The technique of creating the second sheet was the same as the first which created another common denominator of texture. It was then just a matter of selecting a cradled board (2") which is a 12" x 12". I began the process of cutting these two sheets into smaller pieces by using two "L's" as a cropping tool. The lower left hand corner piece was selected first. And then I made the decision to have the burnt sienna pieces be the dominating color and you can also see that those pieces touch all four sides of the design space.

My plan today is to paint a small still life on the piece (with a palette knife). This means I will be switching to heavy body acrylics. But before I do that, there is a possibility I might brayer on some more gesso. I will not make that decision until this afternoon. This gives me time to look at my posting today on my iphone which gives me a different perspective than looking at the actual piece in the studio.

All of the pieces are adhered to the board except for the one that will contain the small still life. And then I will need to come up with an original quote. To this day I still cannot believe that for one year I wrote the quote first followed by the visual. It is so much better to create the visual first. This also holds true for concepts and writing an interpretation for your piece. Trust me.....and do the visual first. And there you have it...just a few more things to think about.

Tuesday, July 2, 2013

"Untitled" (draft 2)

(draft 2)


There will be one more draft of this quarter sheet of 140 lb HP and then you will begin seeing sections of it with another sheet done much the same way with different color notes.  I will then begin to reassemble the sections.

What you see today is four additional layers added to the piece posted yesterday. The first layer today was the inclusion of several text pages. (adhered with gel matte medium) After drying these pieces, I added more paint with a brayer.....Quinacridone Burnt Sienaa (Golden Fluid Acrylic) This is a very strong color so I did dilute it with water (50/50) before applying it to the piece with a brayer by rolling brayer into paint and then rolling it over several segments of the dry piece.

After this second layer was dried, I used an old credit card to deliver more gesso (undiluted) to the surface, but not over the entire surface. (It is best to allow some of the previous layers to show through.) After drying the gesso thoroughly, I sprayed it with alcohol and then brayered over the surface....alternating with the alcohol repeatedly until I was satisfied with the texture. This step with the alcohol and brayer is extremely important to break up some of the hard edges created by the paint and gesso and also to lift up the paint in an erratic fashion. (It creates a "mottled" effect.)

While doing the alcohol and brayer technique, I did inadvertently lift up some of the text pages which created a bit of deconstruction. After thoroughly drying all of this, I did brayer on some more paint in very key areas...followed by spraying with alcohol and brayering through that paint. So you can see that it is a very loose and spontaneous process, but the end result is all about creating depth and texture.

By tomorrow, I will have added some more layers and created another sheet of this plus cutting up some of the pieces and reassembling them on a 2" depth cradled board. And there you have it...just a few more things to think about.

Monday, July 1, 2013

"Untitled" (draft 1)

(draft 1)


Today's new beginning was created with fluid acrylic and gesso. This piece and several others will dramatically change and be reassembled to create a very different kind of color block. So the actual title may not be known for a few postings.

As I have shared so many times, it is always easier to create the visual first before coming up with quotes, titles, or both. This is especially true of abstract work because these types of works are often created through an intuitive and evolving process.

One thing I am also noticing with a great number of pieces under my belt is that the innermost thoughts of my being cannot help but show up in my art. Therefore, it becomes a very spiritual process for those of us who are praying for guidance from the Holy Spirit as we work. It doesn't mean that all work is mature if there is little experience, but the spiritual characteristics we embrace will come shining through.

And that's all the more reason to think and feel deeply about what we create. Passion then becomes the primary ingredient in creating work as well as a mastery of technique and materials. Abstraction has the power to be extremely sloppy and trite, but it also has the power to be filled with spiritual attributes that are quite moving and speak to the inner spirit.

Gesso is one way to create veiled effects that possess spiritual qualities when used in various states of dilution. In this beginning piece today, the color was poured onto glass...a brayer rolled into the paint and applied to dry paper. Several passes of the color were made for more saturation and then it was dried. Full strength gesso was applied over the entire piece with a credit card held close to the surface. A broad edged shaper tool or piece of matboard can also be used. After the gesso was applied, I used a brayer to spread it more thinly, followed by spraying with alcohol, and doing this alternately with the brayer in key areas to create the "veiled" effect. Gestural writing was also done with a pencil before paint or gesso was applied.

So, in essence, the technique involves laying down color and gesso and then removing part of it. There will be more layers of the same technique until there is mystery and depth to the surface texture. And there you have it...just a few more things to think about.